
Experiencing difficulties opening your QuickBooks Desktop company file? The Qb File Doctor, a powerful tool from Intuit, is designed to diagnose and resolve a range of common company file errors. This guide will walk you through how to use the QuickBooks File Doctor to get your company file back on track, especially when you encounter error messages like:
- Error -6150, -6000 -82, -6000 -305, -6000 -301, -6147, or -6130
- Missing or blank customer, vendor, or employee lists within QuickBooks
These errors can disrupt your workflow and prevent access to crucial financial data. Fortunately, the QB File Doctor, integrated within the QuickBooks Tool Hub, offers a streamlined solution. Follow the steps below to download, install, and utilize this utility for efficient company file repair.
Step 1: Download and Install QuickBooks Tool Hub for File Doctor Access
The QuickBooks Tool Hub is your central point for fixing various QuickBooks issues, including company file problems. It incorporates the QB File Doctor and other helpful utilities. To begin, you’ll need to close QuickBooks completely. For optimal performance, especially with the Tool Hub, a Windows 10, 64-bit system is recommended.
- Exit QuickBooks Desktop. Ensure QuickBooks is fully closed before proceeding.
- Download the latest QuickBooks Tool Hub. Obtain the most recent version (1.6.0.8 or newer if available) from the official Intuit download link: QuickBooks Tool Hub Download. Save the installation file to a readily accessible location on your computer, such as your Downloads folder or Desktop.
- Note: If you have previously installed the Tool Hub, you can check your current version by navigating to the “Home” tab within the application; the version number is displayed at the bottom.
- Run the QuickBooksToolHub.exe file. Locate and double-click the downloaded file to initiate the installation process.
- Follow the on-screen installation prompts. Accept the terms and conditions as prompted to proceed with the installation.
- Open the QuickBooks Tool Hub. Once the installation is complete, a QuickBooks Tool Hub icon should appear on your Windows desktop. Double-click this icon to launch the tool hub.
Note: If the desktop icon is not visible, you can search for “QuickBooks Tool Hub” in the Windows search bar (located in your taskbar) and select the application from the search results.
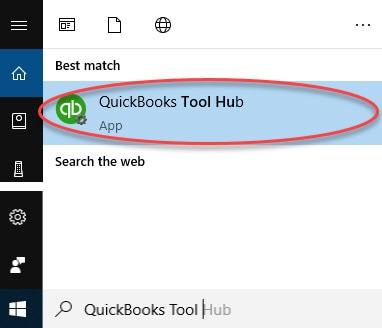 Search for QuickBooks Tool Hub in Windows
Step 2: Utilize Quick Fix my File in Tool Hub
The QuickBooks Tool Hub offers a “Quick Fix my File” option, which can resolve basic company file issues quickly. It’s a preliminary step before running the more comprehensive QB File Doctor.
- Navigate to Company File Issues. In the QuickBooks Tool Hub interface, click on the “Company File Issues” tab.
- Select Quick Fix my File. Click the “Quick Fix my File” button within the “Company File Issues” section.
- Wait for Completion and Launch QuickBooks. Once the quick fix process is finished, click “OK” when prompted. Then, attempt to open your QuickBooks Desktop and access your company file.
Step 3: Run QuickBooks File Doctor for In-Depth Company File Diagnosis
If “Quick Fix my File” doesn’t resolve the issue, the next step is to run the QuickBooks File Doctor tool directly. This tool performs a more thorough scan and repair of your company file.
- Access QuickBooks File Doctor through Tool Hub. In the QuickBooks Tool Hub, under the “Company File Issues” tab, select “Run QuickBooks File Doctor”. Allow up to a minute for the File Doctor to launch.
- Note: If the QuickBooks File Doctor does not open automatically through the Tool Hub, you can manually search for “QuickBooks Desktop File Doc” in your Windows search bar and open it directly.
- Select Your Company File in File Doctor. Within the QuickBooks File Doctor interface, use the dropdown menu to choose your company file. If your file is not listed, click “Browse” to manually locate and select your company file (.QBW) on your computer.
- Choose “Check your file” and Continue. Select the “Check your file (middle option only)” radio button. Then, click “Continue” to proceed.
- Enter Your QuickBooks Admin Password. You will be prompted to enter your QuickBooks administrator password. Input your password and click “Next” to initiate the file scan.
The duration of the scan depends on the size of your company file and the extent of any damage. It can range from 10 to 15 minutes, or potentially longer for very large files. It’s important to note that the scan may sometimes indicate it was “unsuccessful” even if it has successfully repaired the problem.
Once the QuickBooks File Doctor scan is complete, regardless of the success message, attempt to open QuickBooks Desktop and access your company file.
What if QuickBooks File Doctor Doesn’t Fix the Issue?
In some cases, the QuickBooks File Doctor may not be able to resolve all company file issues. If you continue to experience problems after running the tool, it may indicate more significant data damage. In such situations, you’ll need to explore more advanced data recovery and repair options. Intuit provides resources and guides on Fixing data damage on your QuickBooks Desktop company file, which may offer further solutions for complex company file problems.
By following these steps, you can effectively utilize the QB File Doctor to address common QuickBooks company file issues and minimize disruptions to your business operations.