
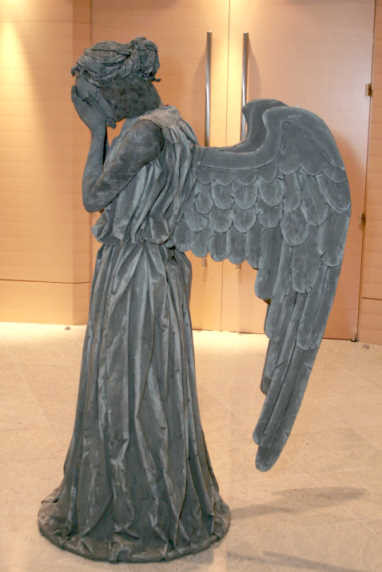
Doctor Who’s Weeping Angels are iconic for their terrifying stillness and quantum-locked existence. The episode “Blink” introduced these chilling statues, cementing them as one of the most frightening monsters in the Whoniverse. Inspired by their petrifying presence, and wanting a unique challenge for DragonCon, I embarked on creating my own Weeping Angel costume. This detailed guide will walk you through the process, offering insights and tips to bring your own stone-cold angel to life, perfect for any Doctor Who fan or cosplay enthusiast.
 Weeping Angel Costume Dress Detail
Constructing the Stone-Like Dress
The dress is the foundation of the Weeping Angel look, requiring a design that mimics the heavy, draped appearance of a stone statue.
Materials:
- Polyester suiting fabric (dark grey)
- Acrylic paint & fabric medium
- Hula hoop
- Velcro
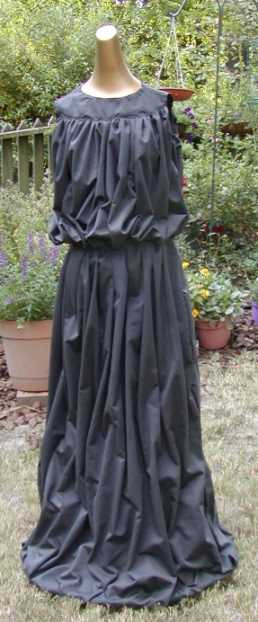
Underdress and Overdress Structure:
To achieve the statue-like form, the dress utilizes a two-layer system. The underdress is fitted and structured, acting as a support for the draped overdress. It’s constructed to be fitted at the top, zipping up the back, and then flaring out into a cone shape towards the hem. A hula hoop is sewn into the bottom hem to provide essential rigid support, ensuring the dress maintains its wide, statue-esque silhouette.
For the fabric, a dark grey polyester suiting was chosen for its smooth finish and substantial body, crucial for holding the sculpted folds of the angel’s robes. The overdress is fashioned from two full widths of fabric, sewn into a large tube and then meticulously draped over the underdress.
 Layered Dress Construction for Weeping Angel Cosplay
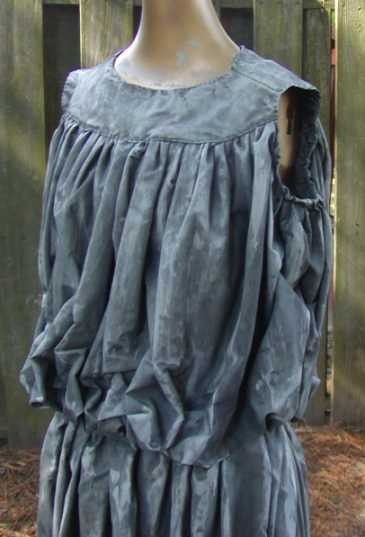
Creating Stone Folds:
The chosen sturdy fabric, while excellent for structure, doesn’t naturally drape. To achieve the characteristic folds of a Weeping Angel, dozens of individual stitches were used to hold the fabric in place, manually sculpting the draped effect.
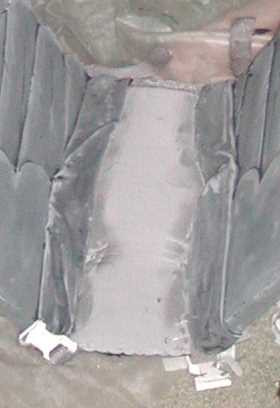
Hidden Wing Panel:
A secret panel at the back of the dress is incorporated to cleverly conceal the central support structure for the wings, maintaining a seamless look from all angles.
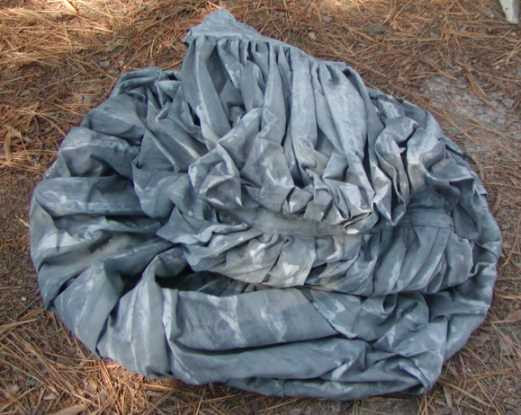
Painting for Stone Texture:
The transformation into stone is achieved through paint. Basic acrylic craft paint, mixed with fabric medium for flexibility and washability, is applied using a highlight and lowlight technique. First, a base coat of the darkest grey covers the entire dress. Then, medium grey is layered over most areas, leaving the dark grey in recesses and shadows. Finally, the lightest grey is sparingly used to accentuate highlights, creating a convincing stone effect.
 Acrylic Painting Technique for Realistic Stone Dress Finish
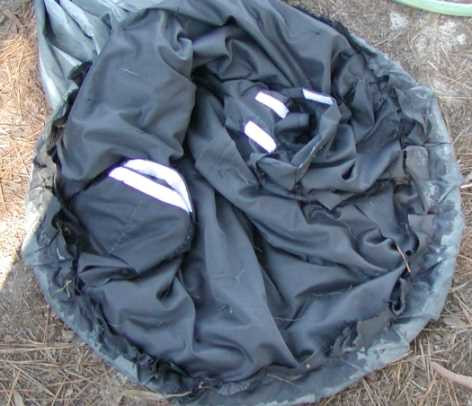
The painted dress effectively tricks the eye; many viewers at DragonCon were compelled to touch the costume, surprised to find fabric and not actual stone. The flexibility of the dress is demonstrated below, showcasing its practicality for movement despite its rigid appearance.
 Flexible Stone-Effect Dress Fabric for Weeping Angel Costume
Practical Costume Elements:
Hidden pockets are essential for any convention costume. Discreetly placed within the dress, they provide space for essentials like a wallet, phone, and water bottle.
 Hidden Pockets Integrated into Cosplay Dress for Practicality
The hidden wing panel is designed to blend seamlessly into the back of the dress, maintaining the illusion of a solid stone statue.
Unique Graffiti Detail:
Adding a personal touch, graffiti details were included, humorously suggesting that even Weeping Angels aren’t immune to the marks of time and human interaction, a quirky addition to the stone statue aesthetic.
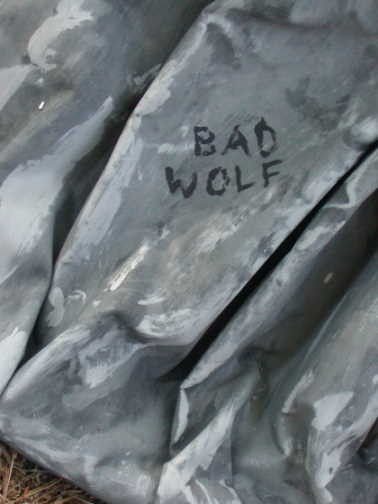 Graffiti Detail on Weeping Angel Dress for Unique Touch
Crafting Angelic Wings
The wings are a defining feature of the Weeping Angels, and creating realistic, imposing wings is crucial for the costume’s impact.
Materials:
- Foamcore posterboard
- Craft foam
- Galvanized wire
- Foam
- Hot glue
- Acrylic paint
- Backpack strapping and buckles
Wing Structure and Patterning:
Reference images were used to ensure accuracy in the wing design. Patterns were initially sketched on newspaper before being transferred to the foamcore base. Foamcore was chosen for its rigidity, with science fair display boards used due to their larger size. These boards, which are pre-folded, were layered to counteract the folds and create a sturdy, flat base.
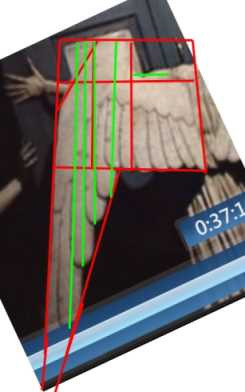 Reference Image Inspiration for Weeping Angel Wing Design
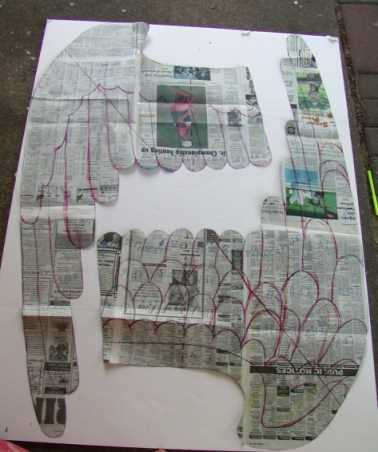 Foamcore Base for Weeping Angel Wings Construction
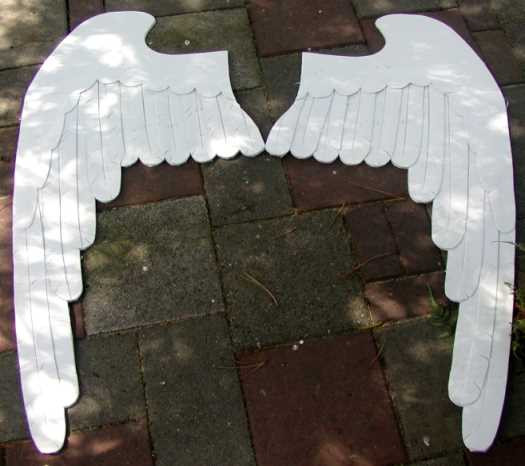
Each wing is constructed from two layers – front and back – providing depth and robustness.
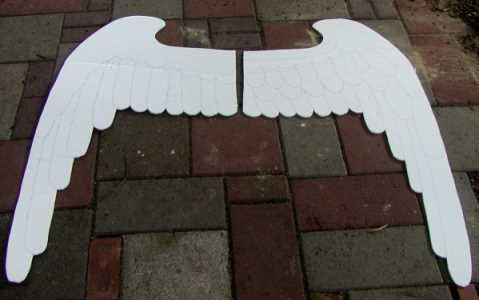 Front and Back Wing Layers for Dimension and Strength
Feather Construction:
The wing pattern was broken down into individual feathers. Craft foam was used to create the feathers, each cut with extra material to allow for overlapping when glued onto the foamcore base, mimicking the layered texture of real feathers.
 Craft Foam Feathers Glued onto Foamcore Wing Base
Wing Support System:
A support structure is integrated between the foamcore layers for stability. Stiff upholstery-type foam was used for the panel connecting the wings, with galvanized wire sewn within and extending outwards to provide robust support and shape.
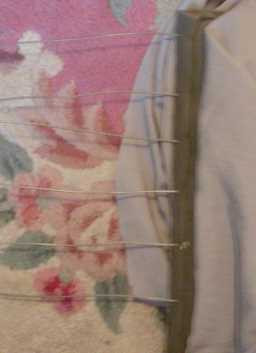 Internal Wire Support System for Wing Stability
Fabric was draped and glued over the entire wing structure, providing a surface for the glue to better adhere to and adding a layer of texture.
Assembly and Weighting:
Massive amounts of hot glue were applied to sandwich the wire supports between the wing halves. A marble-topped coffee table was used as an ideal weight to apply pressure while the glue dried, ensuring a strong bond.
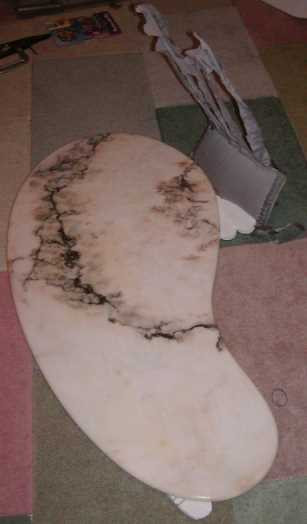 Weighting Wing Halves During Glue Drying Process
To integrate the wings seamlessly with the dress, extra dress fabric was draped around the base of each wing, helping them blend into the overall costume.
 Fabric Blending Wing Base with Dress for Seamless Integration
Wing Painting and Detailing:
The same highlight and lowlight painting technique used for the dress was applied to the wings, using acrylic paint without fabric medium. Notches were cut into the foam feathers to enhance their realism, adding texture and visual interest.
 Painted Foam Feathers with Notched Details for Realism
The finished wings showcase the detailed paintwork and feather texture, ready to complete the Weeping Angel silhouette.
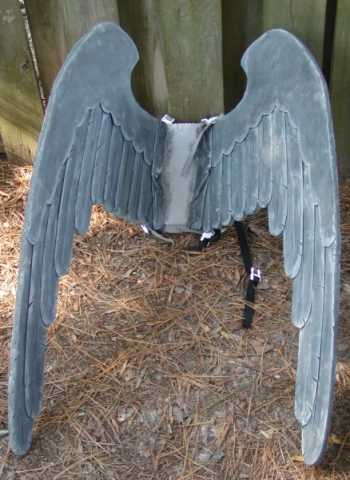 Finished Weeping Angel Wings with Detailed Paintwork
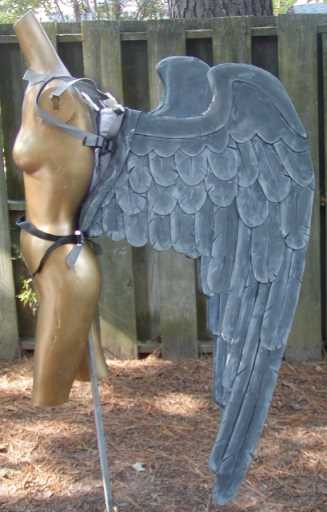
Strap Assembly:
Backpack straps and buckles were used to create a harness for wearing the wings. The strap assembly was noted as needing improvement for easier self-donning, highlighting a practical consideration for wearability.
 Backpack Strap Assembly for Weeping Angel Wings
Crafting the Petrifying Mask
The mask is critical for capturing the Weeping Angel’s haunting expression, or lack thereof.
Materials:
- Paper-mache mask
- Paperclay
- Acrylic paint
- Elmer’s glue
- Plastic gumball machine capsules
- Pantyhose
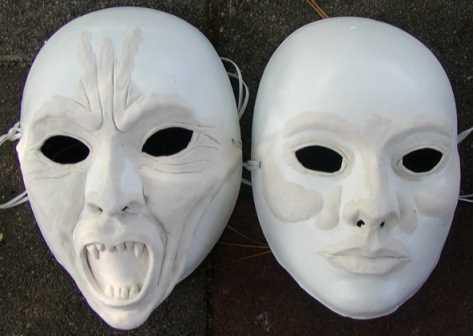
Sculpting the Mask:
Pre-made paper mache masks were used as a base. Paperclay was then used to sculpt the characteristic Weeping Angel features onto the mask. This was the first time sculpting for the creator, emphasizing the accessibility of this DIY project even for beginners.
 Paper Mache Mask Base with Paperclay Sculpting in Progress
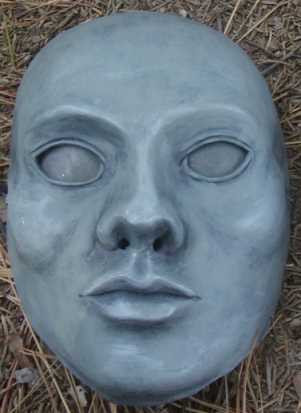
Creating Angel Eyes:
The eyes were crafted from plastic capsules from gumball machines. Lenses were cut from these capsules, covered with grey pantyhose, and hot-glued into the mask openings. The inside of the mask was painted black to minimize light reflection and improve the eerie visual effect.
 Gumball Machine Capsule Lenses for Weeping Angel Mask Eyes
Visibility through the mask is demonstrated in the following image, showing a view through one eye in daylight. Nighttime visibility was significantly reduced, a typical trade-off for costume aesthetics.
 Visibility Test Through Weeping Angel Mask Eye
Mask Painting and Finishing:
The masks were painted using the same highlight/lowlight technique as the dress and wings, with extra attention to detail due to the mask’s prominence. Lenses were glued in after painting to keep them clean.
 Painted Weeping Angel Mask with Stone Texture
 Close-Up of Finished Weeping Angel Mask Detail
The mask is secured with a simple elastic strap. The creator planned to remake the mask for a better fit, noting it was too small, especially for larger head sizes.
 Elastic Strap Closure on Weeping Angel Mask
Crafting the Yarn Wig
The wig completes the head-to-toe stone statue transformation.
Materials:
- Pantyhose
- Yarn
- Acrylic paint & fabric medium
- Fabric
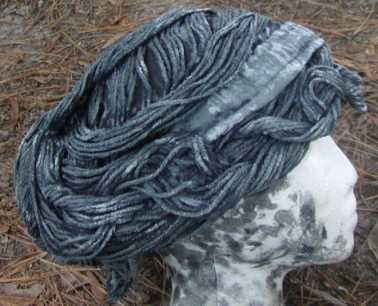
Wig Construction:
Unfortunately, in-progress photos of the wig were not available due to time constraints during creation. The wig base was made by cutting the legs off pantyhose and sewing the remainder into a cap shape. Yarn was stitched down the center seam, then styled and set using a substantial amount of fabric glue (2.5 bottles!). A fabric hairband was added for secure fitting. The wig was painted with acrylic paint mixed with fabric medium to match the stone effect.
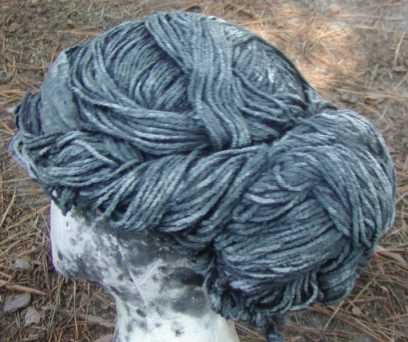
 Yarn Wig for Weeping Angel Cosplay, Front View
 Yarn Wig for Weeping Angel Cosplay, Side View
The internal construction of the wig is shown, revealing the pantyhose base and yarn attachment.
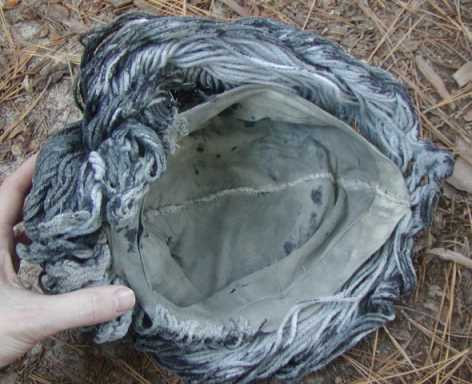 Internal Construction of Yarn Wig Showing Pantyhose Base
The creator planned to remake the wig as it was too small and not entirely accurate to the Weeping Angel hairstyle. Sculpting a wig was considered as a future technique.
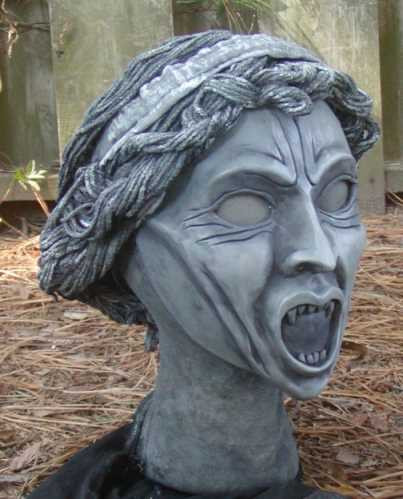 Weeping Angel Cosplay Head and Wig Detail
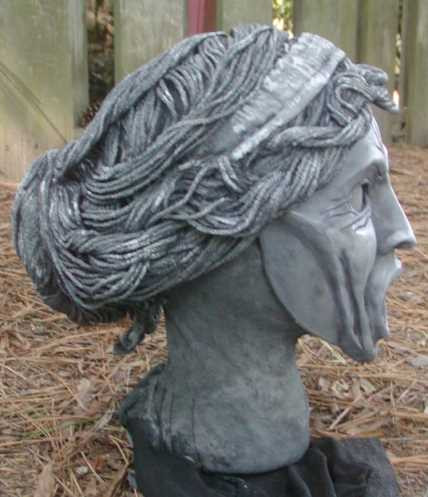 Full Weeping Angel Cosplay Head and Wig View
Stone-Effect Arms, Neck, and Feet
Completing the petrified look requires attention to the exposed skin areas.
Materials:
- Opaque tights
- Acrylic paint & fabric medium
- Nail polish
- Artificial nails
- Toe-socks
- Thrift-store sandals
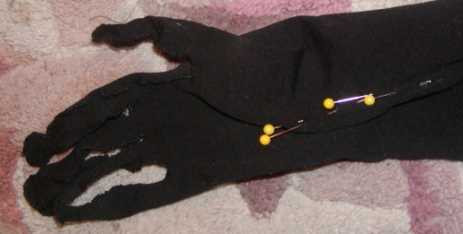
Creating Stone Gloves:
Gloves were needed to avoid makeup application on the arms. Instead of purchased gloves, custom gloves were made from ladies’ opaque tights. The crotch of the tights was cut out to create a neck hole. The tights were then worn with arms through each leg, and finger divisions were marked with pins.
 Tights Used to Create Custom Weeping Angel Gloves
The fabric was cut along the pinned lines, and fingers were hand-sewn using a whipstitch. A small tuck was made at the wrist to improve fit and reduce wrinkles.
 Hand-Sewn Fingers on Tights Gloves for Cosplay
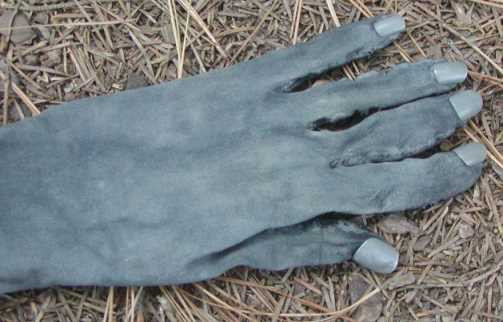
Nail polish was applied to the seams to prevent runs and stabilize the stitching. The gloves were then turned inside-out to hide the seams. Artificial nails were glued onto the gloves while worn to ensure correct placement, using oil or lotion on fingertips to prevent sticking to skin.
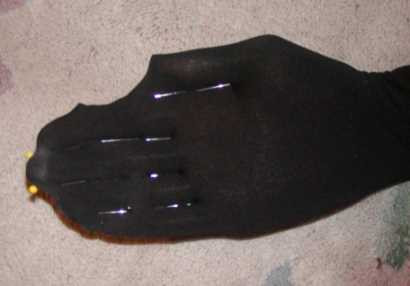
The gloves were painted while being worn to prevent shrinking, using the same acrylic paint and fabric medium mix. Silver nail polish was applied to the artificial nails beforehand to prevent pink from showing through if the paint scratched.
 Freaky Appearance of Stone-Effect Gloves Off-Figure
The gloves create a convincing stone arm illusion when worn.
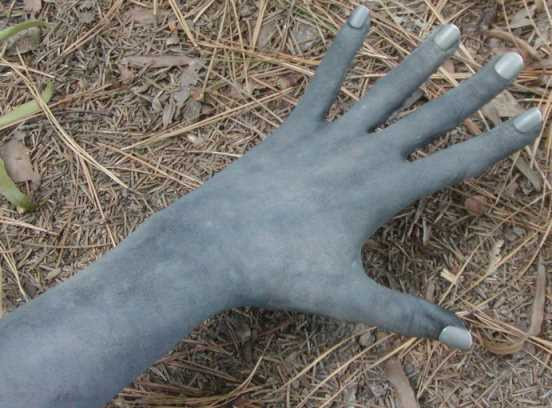 Convincing Stone Arm Illusion with Custom Tights Gloves
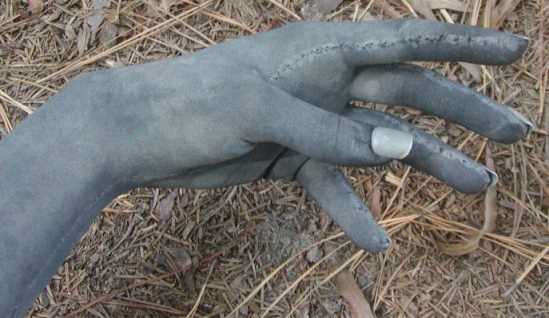 Close-Up of Stone-Effect Gloves and Artificial Nails
Neck and Feet Details:
The neck area was covered with a sleeve made from another pair of tights, with nail polish used to prevent runs.
 Tights Sleeve for Stone-Effect Neck Coverage
As a subtle detail, fake toenails were added to grey toe-socks, and thrift store sandals were painted grey, ensuring even the feet contributed to the stone statue effect if glimpsed.
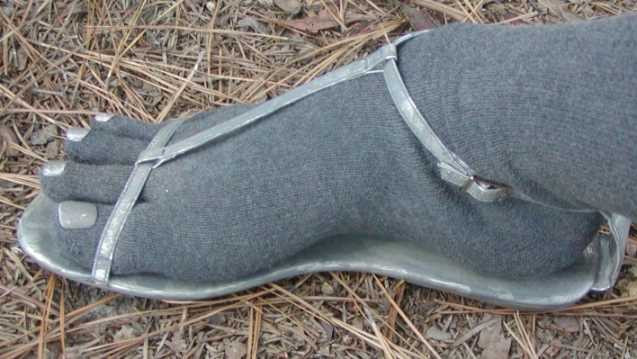 Stone-Effect Feet Detail with Toe-Socks and Painted Sandals
This detailed guide showcases the creation of a complete Weeping Angel costume. While some elements were marked for future improvement, the overall result is a testament to DIY creativity and dedication, bringing one of Doctor Who’s most terrifying villains to life. This costume is sure to impress at any cosplay event or Doctor Who gathering, embodying the chilling stillness of the Weeping Angels.