
This past weekend at DragonCon, I aimed to create a costume that was not only nifty and challenging but also deeply rooted in the Doctor Who universe. Inspired by the chilling episode “Blink,” I decided to tackle the iconic Weeping Angel, a creature that truly embodies fear in stillness. Despite feeling a bit intimidated by the complexity, I plunged in, and the result was more rewarding than I could have imagined.
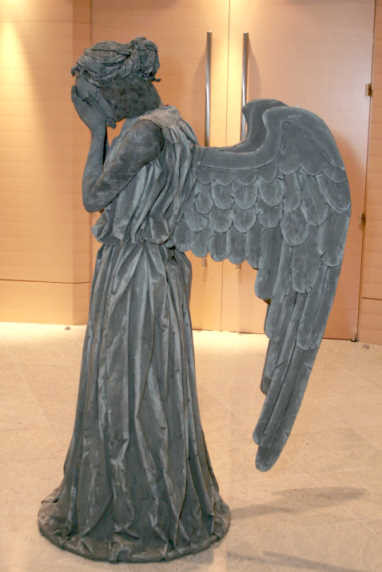 Doctor Who Weeping Angel costume inspiration from the 'Blink' episode, showcasing the iconic menacing statue look.
(Credit for this image is unknown, if you recognize it, please let me know for proper attribution!)
What follows is an extensive, step-by-step guide detailing how I constructed my Doctor Who Weeping Angel costume, perfect for any cosplay enthusiast eager to bring this terrifying statue to life.
The Stone Dress: Foundation of the Weeping Angel Look
The dress is the cornerstone of the Weeping Angel costume, designed to mimic the appearance of weathered stone.
Materials:
- Polyester suiting fabric
- Acrylic/fabric-medium paint
- Hula hoop
- Velcro
Construction:
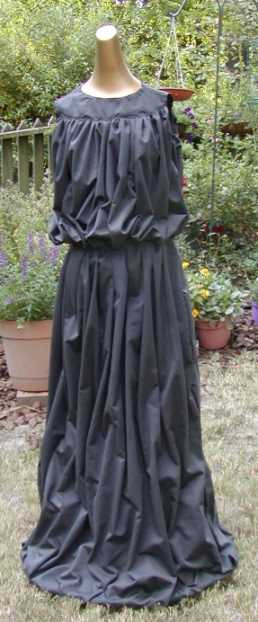
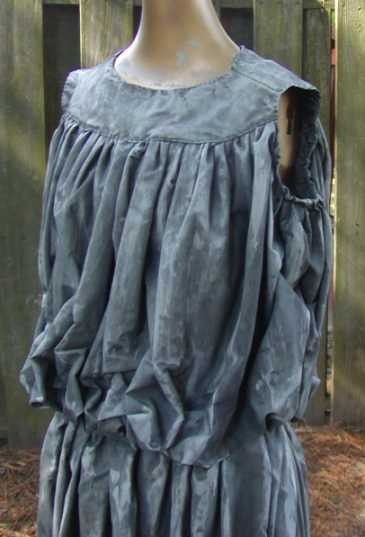
My dress is built from two layers. An inner underdress provides the essential structure and support for the outer layer. This underdress is fitted through the bodice, featuring a zip closure at the back for easy wear, and then dramatically flares out towards the hem, creating a cone-like shape. For added rigidity and to maintain the statue-like silhouette, a hula hoop is sewn into the bottom hem, giving the dress its wide, stable base.
For the fabric, I opted for a dark grey polyester suiting material sourced affordably. Its smooth finish, lacking a noticeable woven texture, and substantial body make it ideal for holding crisp folds and contributing to the stone-like illusion. The overdress, the visible stone layer, is constructed from two full widths of the same fabric, sewn together into a large tube. This tube is then expertly draped over the underdress, allowing for the creation of natural-looking folds and drapes reminiscent of a stone statue’s robes.
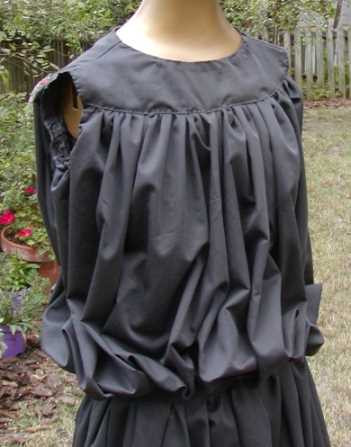
 Close-up view of the Weeping Angel costume dress construction, showing draped fabric and stitched folds for a stone-like texture.
The downside of using such a sturdy fabric is its resistance to draping naturally. To achieve the desired folds and ensure they stayed in place, I meticulously secured each fold with numerous individual stitches. This painstaking process was crucial for achieving the sculpted, stone-like appearance of a Weeping Angel.
 Detailed shot of hand-stitched folds on the Weeping Angel dress, highlighting the craftsmanship in creating realistic statue drapery.
To accommodate the large wings that are essential to the Doctor Who Weeping Angel, I incorporated a hidden panel at the back of the dress. This discreet opening would later conceal the central support structure of the wings, ensuring a seamless integration of all costume elements.
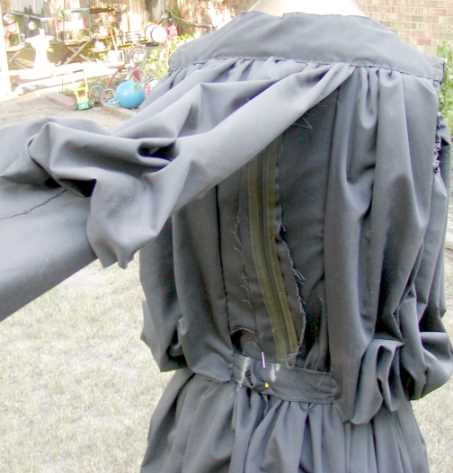 Back view of the Weeping Angel dress showing the hidden panel designed to conceal the wing support structure, maintaining a smooth silhouette.
Painting for Stone Texture:
To transform the grey fabric into believable stone, I employed a classic painting technique using highlights and lowlights. The paint used was basic acrylic craft paint, mixed with fabric medium to ensure flexibility and washability—critical for a wearable costume.
The process began with a base coat of the darkest grey paint applied to the entire dress. Once dry, I layered over most of this with a medium grey, intentionally leaving the dark grey base visible in the shadowed areas and recesses of the folds. Finally, the lightest grey paint was sparingly used to catch only the highest points and edges, mimicking where light would naturally hit stone.
 Painted Weeping Angel dress showcasing the highlight and lowlight technique to create a convincing stone texture on fabric.
The resulting effect was surprisingly convincing. Throughout DragonCon, many attendees approached me, curious to touch the dress, often expressing disbelief that it wasn’t actually made of stone. They were amazed by the tactile illusion of cold, hard stone created entirely with paint on fabric.
For those curious about the dress’s flexibility, despite its stone-like appearance, it’s quite pliable. Here’s a picture of it crumpled in a pile, demonstrating its unexpected softness and wearability:
And, importantly for any cosplayer spending a day in costume, I integrated hidden pockets into the dress lining. These pockets proved invaluable for carrying essentials – wallet and phone in one, and a water bottle in the other, ensuring practicality without compromising the costume’s aesthetic.
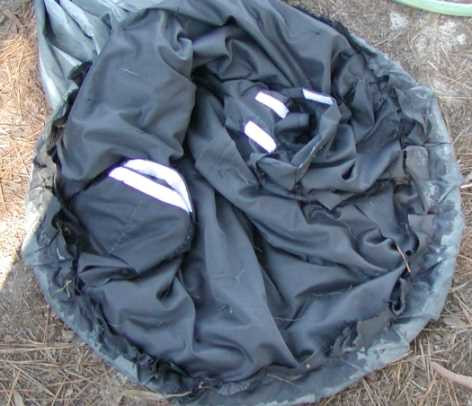 Interior view of the Weeping Angel dress showing hidden pockets for practical storage of personal items during cosplay.
From the back, the hidden wing panel blends seamlessly into the dress, maintaining the uninterrupted stone statue illusion.
Adding a personal touch, I decided to incorporate graffiti onto the dress. It struck me that any aged statue in a public space is bound to accumulate some form of graffiti. This detail, though subtle, added a layer of realism and uniqueness to my Weeping Angel costume, suggesting a history and presence in a lived-in world.
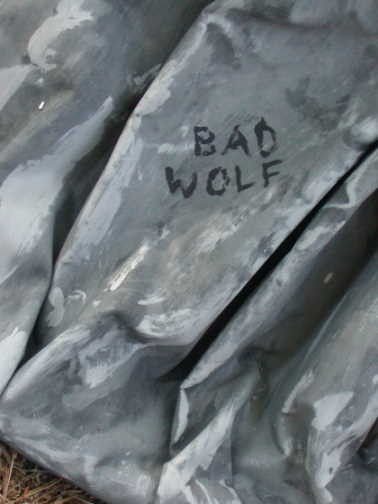 Detail of graffiti added to the Weeping Angel dress, a unique personal touch enhancing the costume's realism and character.
Crafting Angelic Wings: Spread Your Terrifying Span
The wings are, without a doubt, the most visually striking element of the Doctor Who Weeping Angel. Creating wings that were both structurally sound and aesthetically accurate was a significant part of this cosplay project.
Materials:
- Foamcore poster board
- Craft foam
- Galvanized wire
- Foam padding
- Hot glue
- Acrylic paint
- Backpack strapping and buckles
Wing Construction:
Throughout the wing-making process, I frequently referenced images of Weeping Angels to ensure accuracy in shape and feather arrangement. These reference images were crucial for capturing the menacing and ethereal essence of the angel wings.
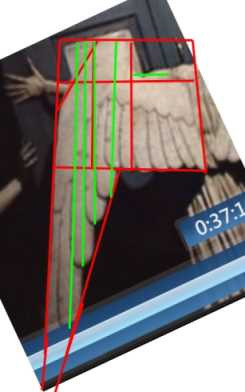 Reference image board used for Weeping Angel wing construction, guiding pattern design and feather detailing.
I started by sketching patterns onto newspaper before transferring them to my wing base material. The core structure of the wings is constructed from foamcore poster board. Finding large enough sheets of foamcore proved challenging initially. However, I discovered oversized display boards, typically used for science fairs, which were ideal. These boards had folds, but by layering two pieces of foamcore and aligning them so the folds opposed each other, I effectively neutralized the folds, creating a robust and flat base.
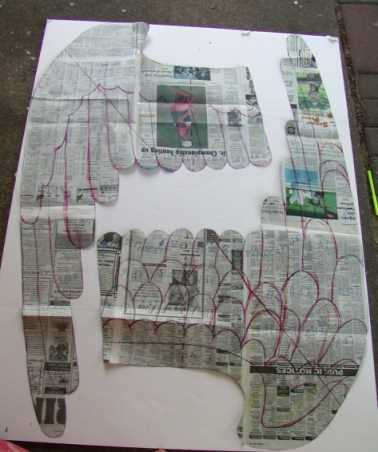 Foamcore base construction for Weeping Angel wings, showing layered foamcore to create a sturdy and flat wing structure.
Each wing is composed of two main pieces: a front and a back panel. This dual-layer construction adds depth and stability to the wings.
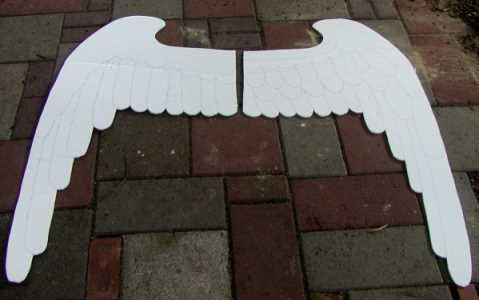 Front and back foamcore panels for Weeping Angel wings, illustrating the dual-layer design for enhanced structural integrity.
The wing pattern was then divided into individual feathers. I added extra margin to each feather pattern piece to allow for overlaps when layering them. The feathers themselves were cut from craft foam and meticulously glued onto the foamcore base. Craft foam provides flexibility and texture, essential for feather realism.
 Craft foam feathers being glued onto the foamcore wing base, detailing the layered feather construction for realistic wing texture.
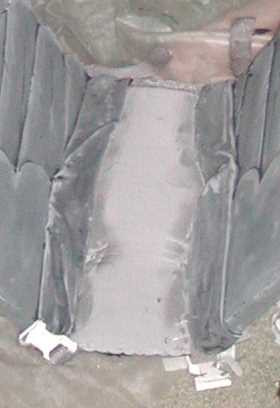
For structural support between the wings, I used a panel made from two layers of stiff upholstery-type foam. Sandwiched between these foam layers, and extending outwards on both sides, was galvanized wire. This wire framework provided the necessary rigidity and shape to the central wing panel, allowing the wings to hold their position effectively.
 Wing support structure using foam padding and galvanized wire, showing internal framework for stability and shape.
To give the glue a better surface to adhere to and to add a layer of finish, fabric was draped over the entire wing structure and sewn in place. Excess fabric was then carefully trimmed away, leaving a clean, fabric-covered wing framework ready for feather attachment and painting.
Massive amounts of hot glue were applied to the wing halves, sandwiching the wire supports securely between them. To ensure even pressure and proper adhesion while drying, I was fortunate to have a marble-topped coffee table, which provided the perfect weight and flat surface for pressing the wing halves together.
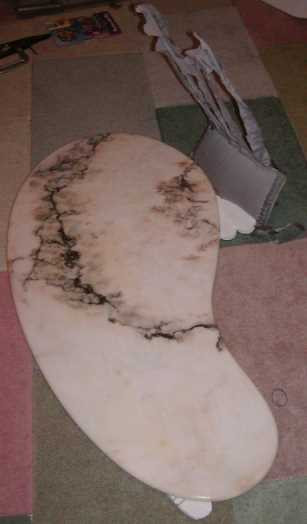 Assembled Weeping Angel wing halves being weighted with a marble table for glue drying, ensuring strong and even adhesion of wing components.
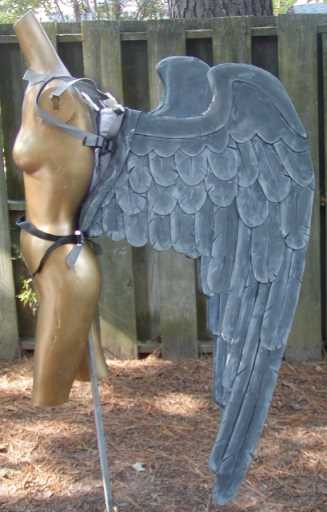
Once fully assembled, I draped additional fabric from the dress around the base of each wing. This step was crucial for blending the wing bases seamlessly with the dress, creating a cohesive and statue-like appearance where wings met the back of the costume.
 Wing base blended with dress fabric, showing seamless integration of wings and dress for a unified costume appearance.
Painting the wings followed the same highlight and lowlight technique used for the dress. I used the same acrylic paints, but without the fabric medium since the wings didn’t require the same flexibility as the dress fabric. Here, you can also see the notches I carefully cut into the foam feathers to enhance their realism, mimicking the natural texture of bird feathers.
 Painted Weeping Angel wings with feather detailing, showcasing highlight/lowlight painting and notched foam feathers for realism.
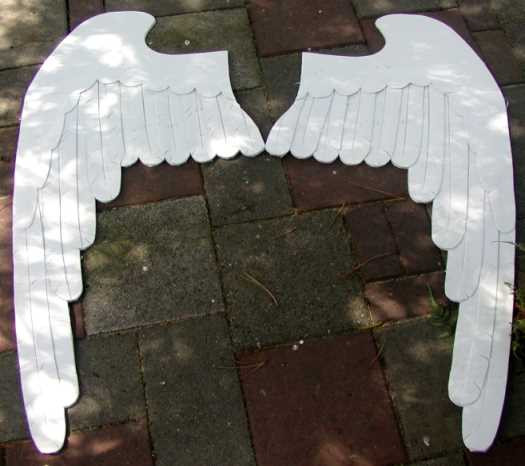
The finished wings, fully painted and assembled, were ready to complete the Doctor Who Weeping Angel transformation.
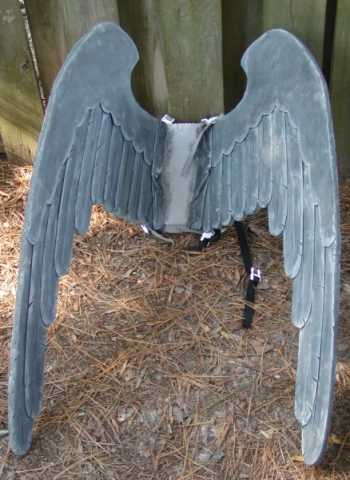 Finished Weeping Angel wings, fully painted and detailed, ready to be attached to the costume for a complete look.
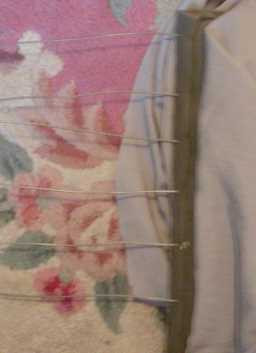
For attaching the wings, I initially used a simple strap assembly. However, I’m planning to redesign this part to make it easier to put on and take off the wings and dress without assistance, improving the costume’s practicality for future events.
 Weeping Angel wing strap assembly, showing initial design for attaching wings to the costume, with plans for future improvements for ease of use.
The Stone Mask: Blank Stare of Terror
The mask is critical for capturing the unsettling stillness of the Doctor Who Weeping Angel. Creating a mask that was both visually accurate and wearable presented its own set of challenges.
Materials:
- Paper-mache mask
- Paperclay
- Acrylic paint
- Elmer’s glue
- Plastic gumball machine capsules
- Pantyhose
Mask Creation:
For the mask base, I started with pre-made paper mache masks. As I had no prior sculpting experience, this was a new and exciting challenge. I used paperclay to sculpt additional features onto the paper mache base, refining the shape and adding the characteristic Weeping Angel facial structure.
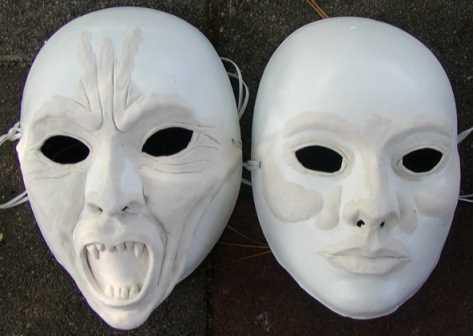 Paper mache mask base with paperclay sculpting to shape Weeping Angel facial features, demonstrating the initial mask construction phase.
The eyes were created using lenses cut from plastic capsules sourced from gumball machines. These clear plastic lenses were covered with grey pantyhose to diffuse light and obscure the wearer’s eyes, enhancing the eerie, blank stare of the Weeping Angel. The pantyhose-covered lenses were then hot-glued into the eye sockets of the mask. To minimize light reflection and improve the depth of the eye sockets, the interior of the mask was painted black.
 Weeping Angel mask eye construction using gumball machine capsules and pantyhose, showing materials and technique for creating blank, light-diffusing eyes.
To give an idea of the visibility through the mask, here’s a photo taken through one eye lens in broad daylight, showing my neighbor’s car. While visibility was manageable during the day, it was significantly reduced at night. However, it was sufficient for navigating convention spaces.
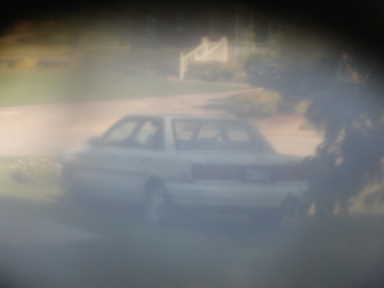 Visibility test through Weeping Angel mask eye lens in daylight, demonstrating field of vision and light diffusion through pantyhose covering.
The masks were painted using the same highlight and lowlight technique as the dress and wings, but with greater attention to detail given the mask’s central role in the costume’s impact. Importantly, the lenses were glued in after the painting was completed to keep them clean and paint-free.
 Painted Weeping Angel mask with lenses unattached, showcasing detailed paintwork and highlight/lowlight technique before eye lens installation.
 Close-up of painted Weeping Angel mask, highlighting facial details and stone texture achieved through painting techniques.
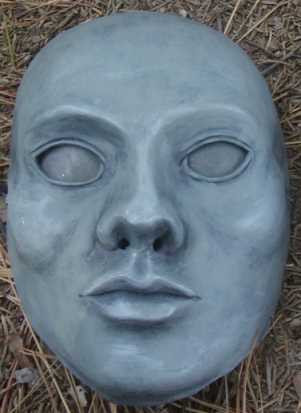
The mask is secured with a simple elastic strap. However, I’m planning to remake the mask as the current version, while looking decent on a mannequin, is a bit too small for comfortable wear. A larger, more accurately sized mask is on my list for future improvements.
 Weeping Angel mask on mannequin head, showing overall shape and fit, with plans for remaking a larger, more comfortable version.
The Stone Wig: Hair of a Statue
The wig was another element where I aimed to replicate the stone-like texture and style of a Doctor Who Weeping Angel.
Materials:
- Pantyhose
- Yarn
- Acrylic paint/fabric-medium
- Fabric
Wig Creation:
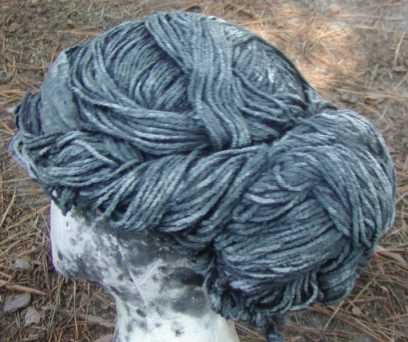
Unfortunately, I don’t have in-progress photos of the wig construction as I was under time constraints and didn’t document the process. Essentially, I cut the legs off a pair of pantyhose and sewed the remaining portion into a cap shape. Yarn was then stitched down the center seam of this cap. The yarn was styled to mimic the Weeping Angel’s hair and then saturated with approximately 2.5 bottles of fabric glue to stiffen and hold the style. A fabric hairband was added for secure fitting. Finally, the entire wig was painted with acrylic paint mixed with fabric medium to achieve the stone-like color and texture.
 Front view of Weeping Angel wig, showing styled yarn hair and painted stone texture, completing the head portion of the costume.
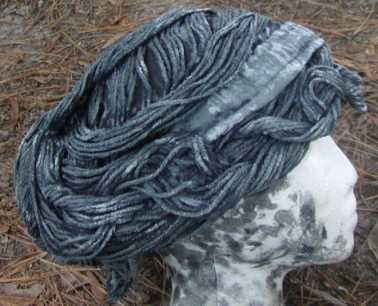
 Side view of Weeping Angel wig, highlighting the sculpted yarn hair and fabric headband for secure and comfortable wear.
Here’s a shot showing the internal construction of the wig, revealing the pantyhose cap and yarn attachment.
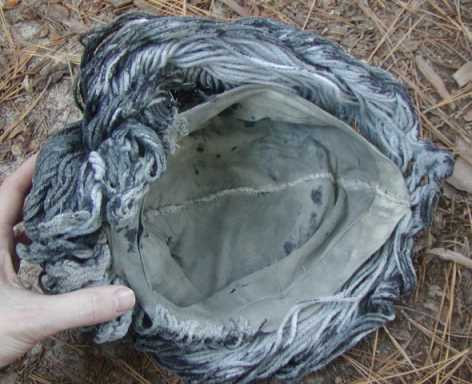 Internal construction of Weeping Angel wig, showing pantyhose cap base and yarn attachment method for hair styling.
Similar to the mask, I plan to remake the wig. It ended up being too small and not entirely accurate to the Weeping Angel’s hairstyle. For the next iteration, I’m considering sculpting a wig base to achieve a more precise and comfortable fit.
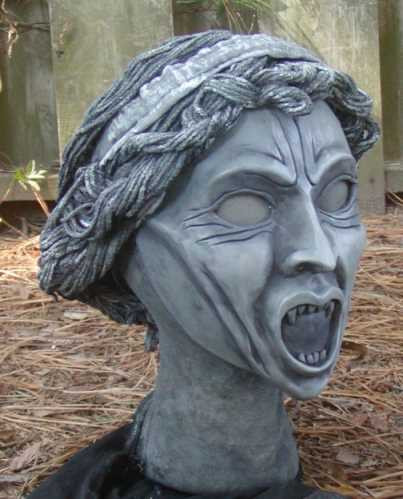 Full head view of Weeping Angel costume with mask and wig, showcasing the complete headpiece and overall stone statue aesthetic.
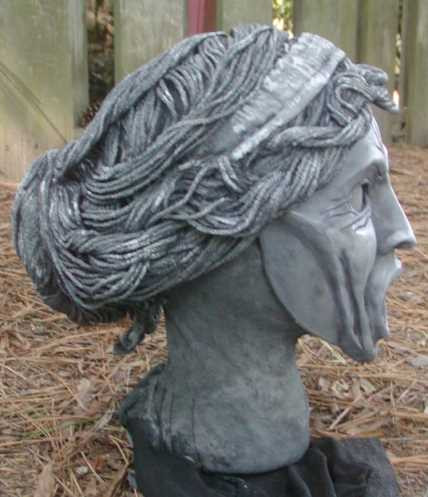 Profile view of Weeping Angel costume headpiece, highlighting wig styling and mask details, completing the statue-like head appearance.
Stone Arms, Neck, and Feet: Extending the Statue Effect
To fully embody the Doctor Who Weeping Angel, it was essential to extend the stone effect beyond just the dress, mask, and wig to include the arms, neck, and even feet.
Materials:
- Opaque tights
- Acrylic paint/fabric-medium
- Nail polish
- Artificial nails
- Toe-socks
- Thrift-store sandals
Creating Stone Skin:
Knowing my limitations with makeup, I opted for a glove-based approach to create the stone arm effect. After experimenting with store-bought gloves and finding them unsuitable, I decided to make my own arm coverings.
I started with a pair of ladies’ opaque tights and cut out the crotch area to create a neck opening. Pulling the tights on with one arm through each leg, I used pins to mark the divisions between my fingers directly on the tights.
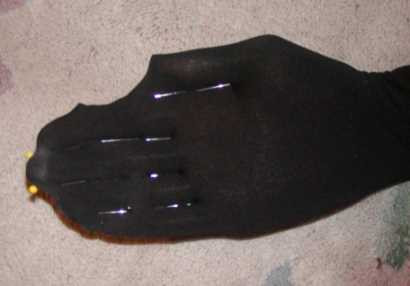 Opaque tights being pinned to shape finger divisions for Weeping Angel gloves, showing initial steps in glove construction.
Following the pin markings, I cut along these lines and then hand-sewed the finger seams together using a whipstitch. To refine the fit around the wrist, I added a small tuck to smooth out any wrinkles in the glove fabric.
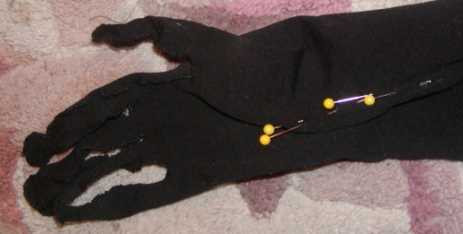 Hand-sewn finger seams on Weeping Angel gloves, detailing the whipstitch technique and wrist tuck for improved fit.
Immediately after sewing, I dabbed nail polish along the seams to stabilize them and prevent any runs in the tights fabric. Then, I turned the gloves inside out, concealing the seams on the inside (at this stage, the right glove becomes the left and vice-versa).
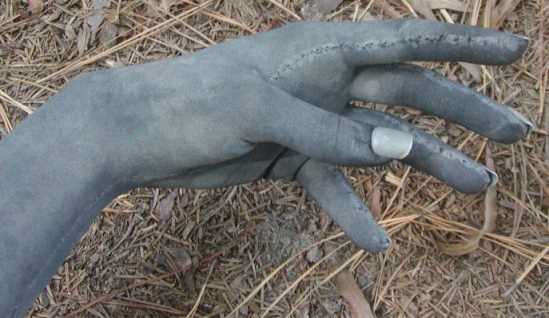
To enhance the finger illusion, I glued artificial nails to the glove fingertips. Crucially, this step was done while wearing the gloves to ensure correct nail placement. To prevent the glue from sticking to my skin, I applied a bit of oil or lotion to my fingertips and nails before putting on the gloves.
Painting the gloves was also done while wearing them to avoid shrinkage and ensure a perfect fit. I used the same acrylic paint and fabric medium mixture as before. Before painting the gloves, I applied several coats of silver nail polish to the artificial nails to prevent any pink plastic from showing if the paint scratched off.
Off the body, the gloves look quite strange and almost unsettling.
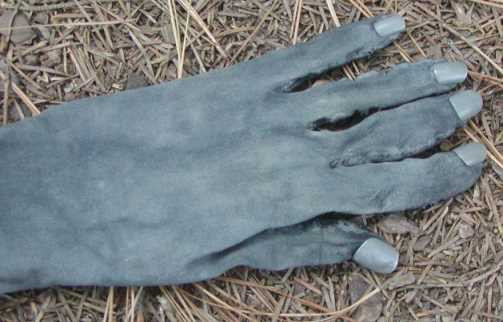 Weeping Angel gloves off-hand, showing unusual appearance and finger shaping with artificial nails attached.
However, once worn, the illusion is remarkably convincing, seamlessly blending with the overall stone statue effect of the Doctor Who Weeping Angel costume.
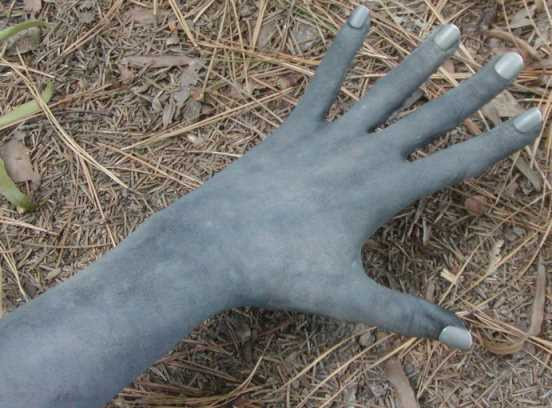 Weeping Angel gloves worn, demonstrating realistic stone arm illusion and seamless integration with costume.
 Close-up of Weeping Angel gloves worn, highlighting finger detail and painted stone texture for convincing arm transformation.
The neck area is covered with a sleeve made from another pair of tights, employing nail polish again to prevent any runs in the fabric and ensure a clean edge.
 Weeping Angel neck covering made from tights, showing seamless integration with costume and nail polish application to prevent fabric runs.
In a detail that might go unnoticed by most but adds to the completeness of the costume, I even addressed the feet. Just in case anyone glimpsed my feet, I added fake toenails to a pair of grey toe-socks. The sandals were thrift store finds, painted grey to match the overall stone aesthetic.
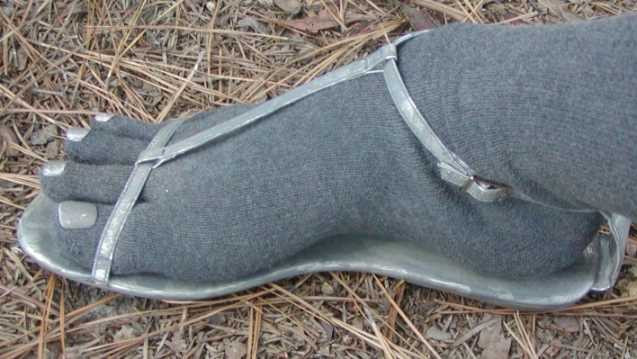 Weeping Angel feet detail with painted sandals and fake toenails on grey toe-socks, showing attention to detail in completing the stone statue look.
And that concludes the construction of my Doctor Who Weeping Angel costume! As mentioned, there are elements I plan to refine and remake, but considering the time constraints and the ambition of the project, I am extremely pleased with the final result. This costume was a challenging and rewarding journey into bringing one of Doctor Who’s most terrifying creations to life. If you’re a Doctor Who fan and a cosplay enthusiast, I hope this detailed guide inspires you to try creating your own Weeping Angel!