
Are you ready to travel through time and space this Halloween? If you’re a fan of the iconic BBC series Doctor Who, then you’re in for a treat! This year, ditch the generic costumes and dive into the Whoniverse with DIY Halloween Costumes Doctors inspired. Just like us, you might find yourself completely hooked on the adventures of the Doctor, and what better way to show your fandom than by embodying your favorite characters?
We’re a family of self-confessed nerds, and family costumes are our absolute favorite. This year, we embraced our inner Whovians and created our own Doctor Who inspired costumes. It was easier than you might think, and incredibly rewarding to bring these beloved characters to life.
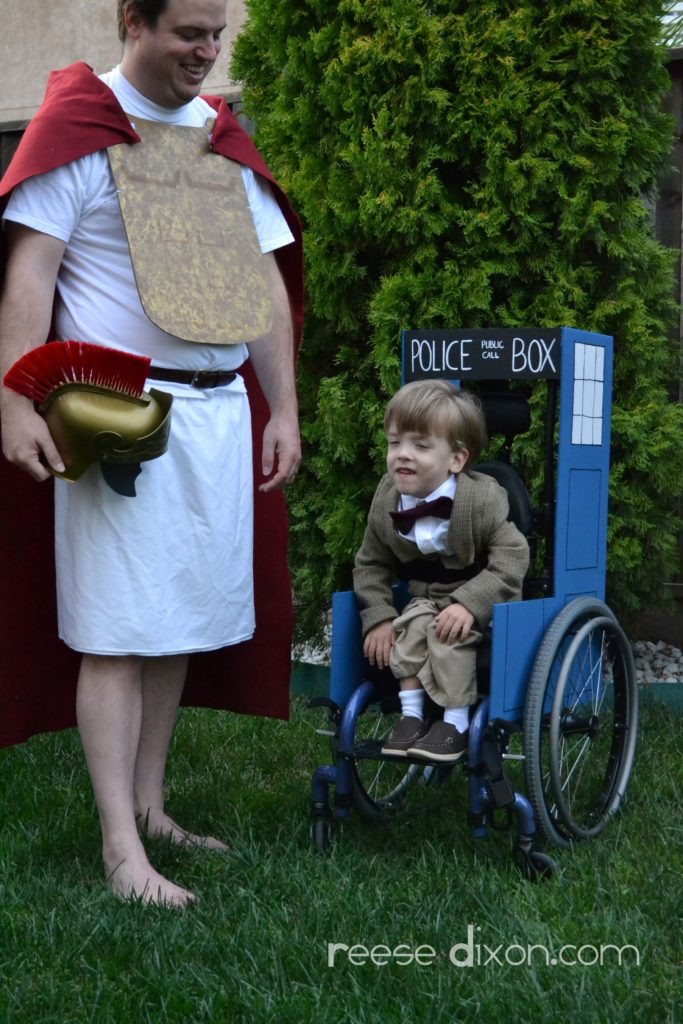
My costume was a breeze – channeling Amy Pond, the Doctor’s fiery companion, was half done thanks to my natural red hair! My partner took on the role of Rory Williams, Amy’s husband and the sometimes-Roman Centurion. And for our little one, we crafted a costume that incorporated his wheelchair, transforming it into the Doctor’s iconic time-traveling machine – the TARDIS!
Want to join us on this DIY adventure? Here’s how we created our Doctor Who family costumes, so you can embark on your own time-traveling Halloween adventure.
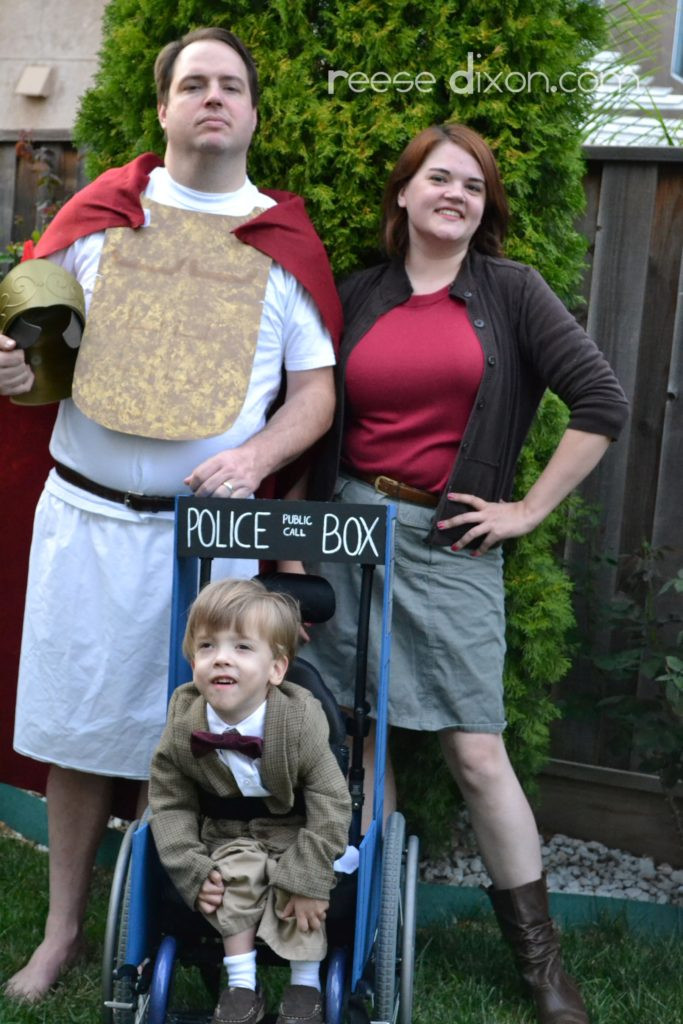
Family dressed in Doctor Who Halloween costumes, featuring Amy Pond, Rory the Roman Centurion, and a child in a wheelchair TARDIS costume.
Crafting Rory the Roman Centurion Costume
Finding affordable Roman armor proved to be more challenging than battling Daleks! Store-bought options were simply too expensive for a Halloween costume. So, we decided to get crafty and create our own Roman Centurion armor for Rory’s costume. Here’s how we did it:
DIY Roman Breastplate
We used foam core, a lightweight and inexpensive material, as the base for the breastplate.
- Shape the Breastplate: Cut the foam core into the basic shape of a Roman breastplate. You can find templates online or simply freehand it, aiming for a slightly curved, rectangular shape that covers the chest area.
- Paint the Base: Paint the foam core breastplate brown. This will be the base color of the armor.
- Add Gold Detailing: Using gold paint and a sponge, dab gold accents onto the brown base. This sponging technique creates a textured, metallic look, mimicking the appearance of aged metal.
- Create Muscle Definition: To add dimension and create the illusion of muscle, we used watered-down brown paint. Thin the brown paint with water to make it translucent, then lightly draw squares onto the breastplate. This subtle shading technique adds depth and visual interest, making the armor look more realistic.
- Secure the Breastplate: Punch holes on the sides of the breastplate and use ties to fasten it onto the wearer. This allows for adjustability and comfortable wear.
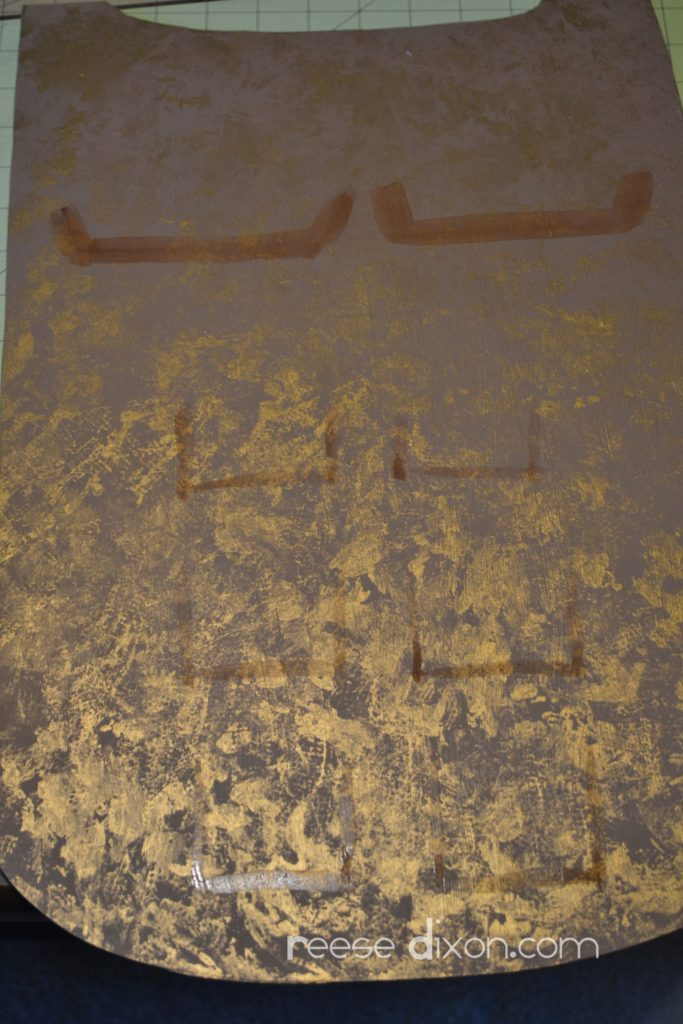
DIY Roman Centurion breastplate costume piece made from painted foam core, part of a homemade Rory Williams Doctor Who Halloween costume.
Roman Tunic and Cape
The rest of Rory’s Roman Centurion costume was surprisingly simple to put together:
- Simple White Tunic: We used a plain white T-shirt as the base for the tunic. If you want a more authentic look, you could opt for an oversized white shirt or even create a simple tunic from white fabric.
- Easy Fabric Skirt: For the skirt, we used a scrap piece of fabric. To keep it super easy, we folded the fabric so the selvedges (finished edges) acted as the hem, eliminating the need for hemming. We sewed a single seam up the back to create a tube shape and then added a casing at the top for elastic. Thread elastic through the casing to create a simple and comfortable skirt.
- Felt Cape: A red felt cape completes the Roman Centurion look. We used about 1 1/2 yards of red felt. Drape the felt over the shoulders and secure it to the breastplate with Velcro for easy on and off.

Close-up of the Roman Centurion costume showing the foam core breastplate, white tunic, fabric skirt, and red felt cape, elements of a DIY Doctor Who Rory Williams costume.

Full view of the DIY Roman Centurion costume for Rory Williams, featuring homemade breastplate, white tunic, simple skirt, and red cape, part of a Doctor Who family costume theme.
Transforming a Wheelchair into the TARDIS
The TARDIS (Time And Relative Dimension In Space) is the Doctor’s iconic time machine, disguised as a blue police box. Incorporating the TARDIS into our child’s wheelchair costume was a perfect way to make his wheelchair part of the fun!
- Foam Core Construction: Just like the breastplate, we used foam core to build the TARDIS structure.
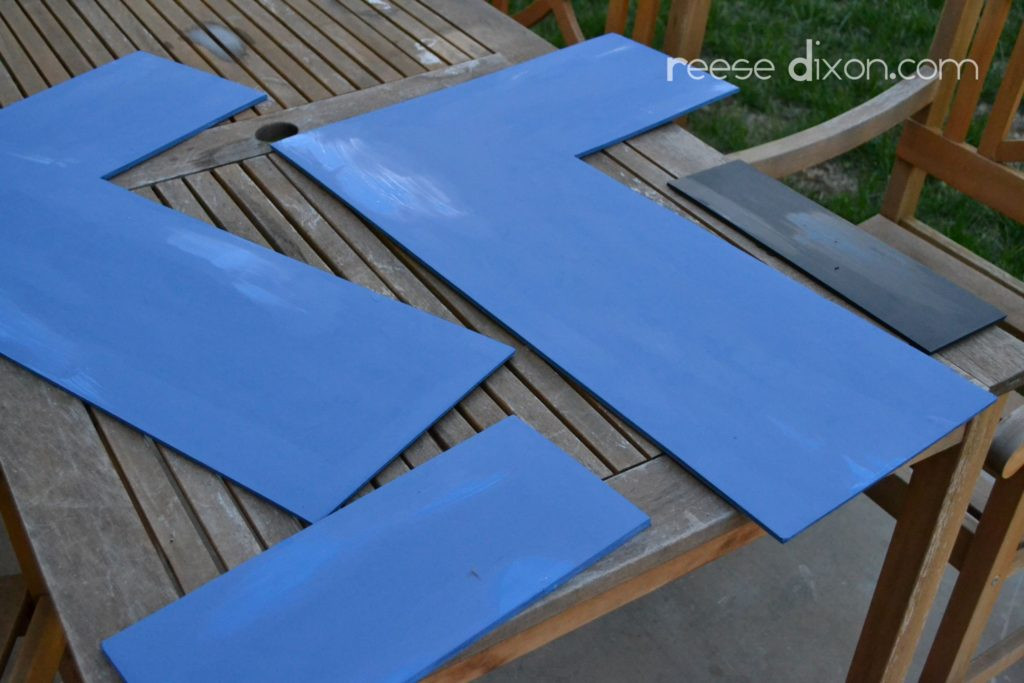
- L-Shaped Side Panels: Cut two pieces of foam core into L-shapes. These will form the sides of the TARDIS and allow access to the wheelchair wheels.
- Front and Back Panels: Cut two more pieces of foam core, 15 inches wide, to match the width of the wheelchair. One of these will be the front panel with the TARDIS signage, and the other will be the back.
- Paint it Blue: Paint all the foam core pieces a vibrant, shocking blue – the signature color of the TARDIS.
Child in a wheelchair wearing a TARDIS costume, constructed from blue painted foam core, a creative Doctor Who Halloween costume idea.
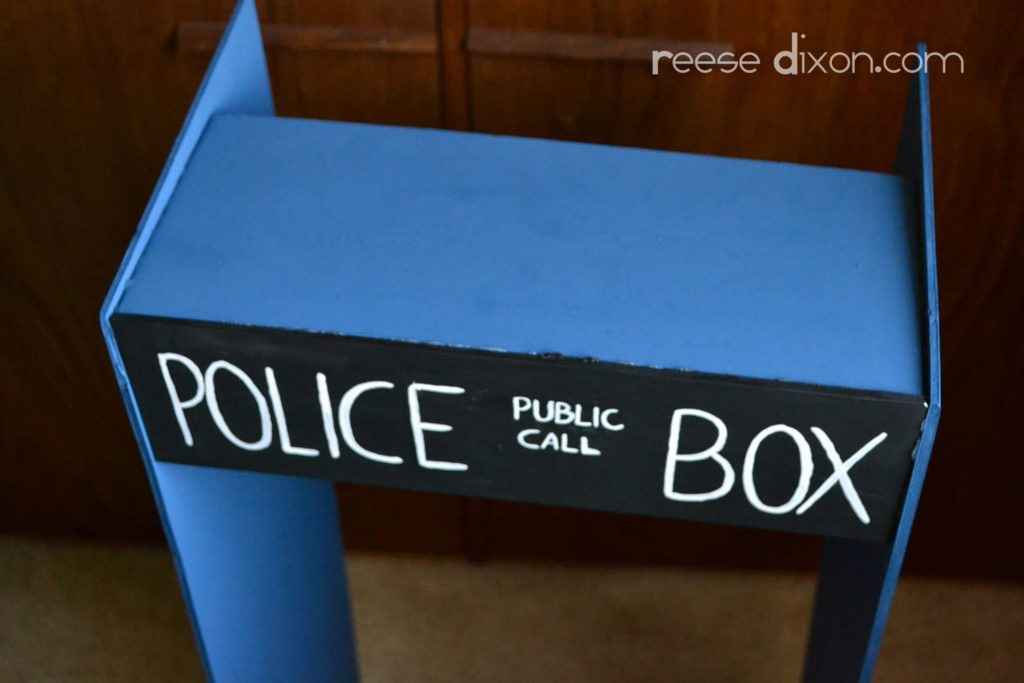
TARDIS Details: Paneling and Windows
To make the TARDIS recognizable, we added the signature paneling and windows:
- Paneling with Fabric Paint: Once the blue paint is dry, use black fabric paint to draw squares onto the foam core, mimicking the paneling of the TARDIS.
- Window Panels: For the windows, we glued pieces of glossy white cardstock onto the inside of the panels. Then, using black fabric paint again, we drew window panes onto the cardstock to complete the window effect.
- Assembly: Use hot glue to assemble all the foam core pieces into the TARDIS shape.
- Wheelchair Attachment: Secure the TARDIS to the wheelchair using zip ties, ensuring it is stable and safe.
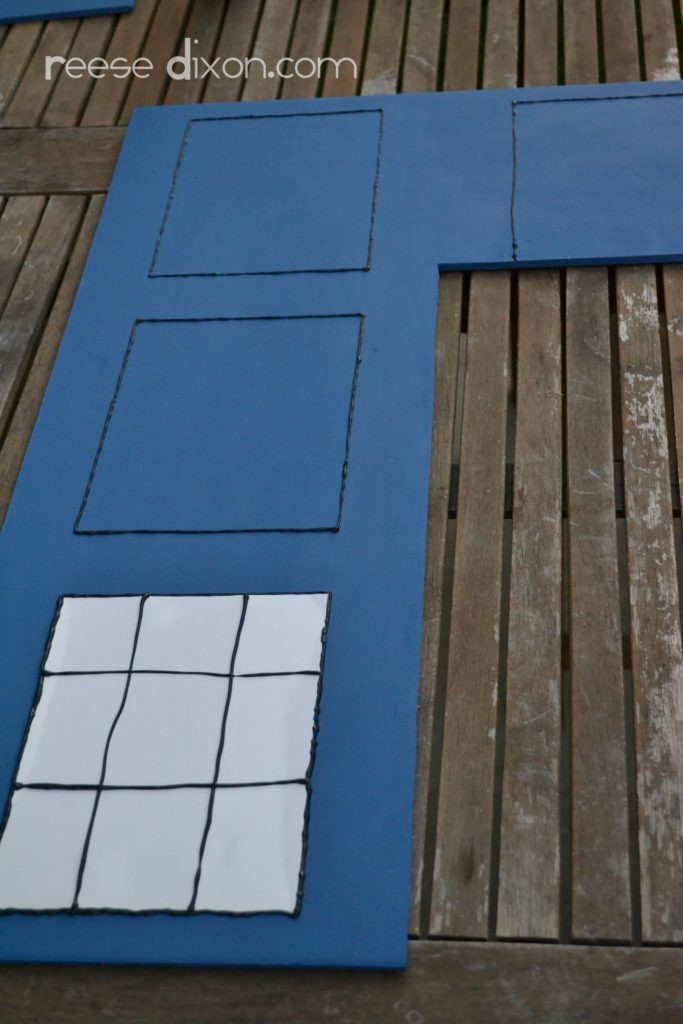
Close-up detail of the DIY TARDIS wheelchair costume showing paneling and window details created with paint and cardstock, a homemade Doctor Who inspired costume.
Completed TARDIS wheelchair costume, ready for Halloween, a creative and inclusive Doctor Who costume idea.
Crafting a Mini 11th Doctor Tweed Blazer
Every Doctor has their signature style, and the 11th Doctor, known for traveling with Amy and Rory, is famous for his tweed blazer and bowtie. “Bowties are cool!” as the Doctor himself would say. Finding a toddler-sized tweed blazer proved impossible, so we decided to make one!
Toddler wearing a handmade tweed blazer and bowtie, dressed as the 11th Doctor for Halloween, part of a Doctor Who family costume theme.
Even if you’re not a Doctor Who fan, a tweed blazer is undeniably adorable on any child. We’ll share a simple guide on how to create a toddler-sized tweed blazer, perfect for an 11th Doctor costume or just for adding a touch of dapper style to your little one’s wardrobe. (Instructions for the blazer would be in a separate post, as referenced in the original article’s related posts).
Get Ready to Exterminate Halloween!
Creating these DIY Doctor Who halloween costumes doctors was a fantastic family project. Not only did we save money, but we also had a blast bringing our favorite characters to life. Whether you choose to be a companion like Amy Pond, a hero like Rory, or even transform a wheelchair into the iconic TARDIS, DIY costumes add a personal touch to your Halloween celebrations. So grab your foam core, paint, and sonic screwdriver (optional!), and get ready for a time-traveling Halloween adventure!